This is the second part of a 2 part series on setting up Unity’s Video Player for both 2D UI viewing and 3D viewing. Both are very similar in how they work, with some minor differences. This page will cover How to Set up Unity’s Video Player for 3D Viewing.
Read Part 1: How to Set Up Unity’s Video Player for 2D UI & 3D Viewing
3D Video Player
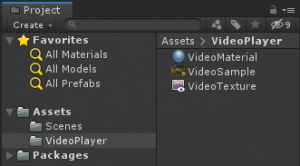
Right click in the VideoPlayer folder and Create > Render Texture. Name the file VideoTexture.
Right click Create > Material. Name it VideoMaterial.
If you have not already, add your video sample file to the VideoPlayer folder.

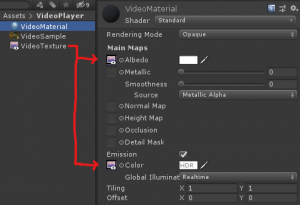
For a 3D video player, select the VideoMaterial and drag the VideoTexture to its Albedo and Emission Color properties.

The Emission > Color property will make your 3D object have somewhat of a glow like a normal TV or movie screen. No other lighting should be required in order to see your video playing.
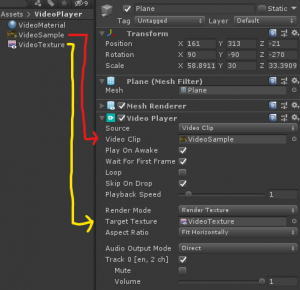
Create a 3D Plane or any other 3D object, and select preferred size. (Example is set quite large to match the 2D UI Panel for this demonstration). The size can be changed later.
Drag the VideoMaterial onto your 3D plane. Add a Video Player component to the 3D object, drag the VideoSample file into the Video Clip property, and the VideoTexture into the Target Texture property.

Push play on the Unity Editor and your video will begin to play.
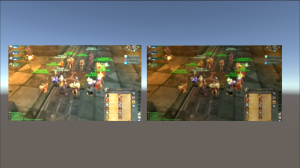
This is the end result from following both 2D and 3D walkthroughs.

Notice the 3D Plane on the left is bright, as it is self illuminated because of the Emissions property set on the Video Material. The 2D UI example, on the right, is using a Render Texture instead and does not glow like a normal TV or movie screen, but is built for UI.

Brock Kunz is a Senior Software Developer at Heizenrader who has overseen Case Viewer development for the Education XR desktop, mobile, and VR platforms. With over 8 years of development experience, he is a trusted C# and Unity Game Engine programmer who specializes in building both 2D and 3D applications.
Follow Brock on Twitter: @Enkendu