This is the first part of a 2 part series on setting up Unity’s Video Player for both 2D UI viewing and 3D viewing. Both are very similar in how they work, with some minor differences. This page will cover How to Set up Unity’s Video Player for 2D UI Viewing.
Read Part 2: How to Set Up Unity’s Video Player for 3D Viewing
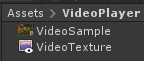
First, you will want to set up some structure so that you can find and reference everything you need for setting up the Video Player. You will need to create a folder under the Project/Assets folder called VideoPlayer.

Right click in the VideoPlayer folder and Create -> Render Texture, naming the texture VideoTexture.
Import any sample video files you would like to use into the same Project/Assets/VideoPlayer folder. You can add to or change this later, if desired.
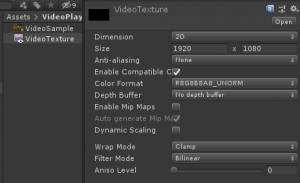
Now that you have both assets in place, select the VideoTexture file. 1920 x 1080 is a common aspect ratio in the size property, but you need to set this to the common resolution of the video files you will be playing. This can be changed later, if desired.
Right click in the Hierarchy and navigate to UI > Panel. This will automatically create a Canvas, with the new Panel inside of it, and an EventSystem in the scene.
Select the Panel, remove the Image component in the inspector, and Add Component > Raw Image to the panel, instead.
Assign the VideoTexture to the Texture property on the Raw Image component. The Raw Image component allows you to make video players for UI purposes specifically.
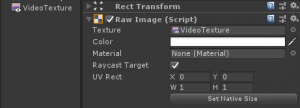
Notice there is a material property in the Raw Image property. This allows you to use a material instead of a texture. Materials in the 3D Video Player are covered in Part 2: How to Set Up Unity’s Video Player for 3D Viewing.
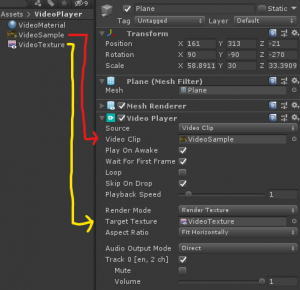
Add the Video Player component to your UI panel, assign the VideoSample file to the Video Clip property on the Video Player.
Assign the VideoTexture to the Target Texture on the Video Player. Be sure to set your panel or canvas size to your preferred size, but be sure to keep a similar aspect ratio to the one you set in the VideoTexture.
![]()
Push play in the Unity Editor and your video will start playing on the 2D UI Panel.
Read Part 2: How to Set Up Unity’s Video Player for 2D UI & 3D Viewing
 Brock Kunz is a Senior Software Developer at Heizenrader who has overseen Case Viewer development for the Education XR desktop, mobile, and VR platforms. With over 8 years of development experience, he is a trusted C# and Unity Game Engine programmer who specializes in building both 2D and 3D applications.
Follow Brock on Twitter: @Enkendu