In this post, we’ll walk through how to create a VR-ready asset using 3ds Max, Vray, 3d Coat, and Substance Painter.
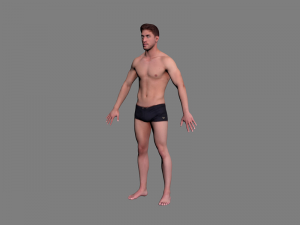
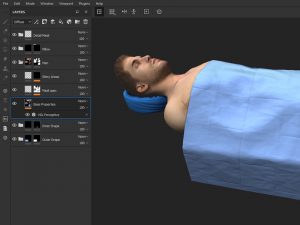
For this demonstration, we’ll begin with a high-quality textured male 3d model.
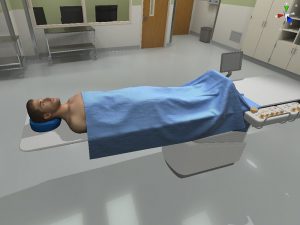
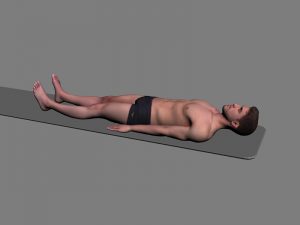
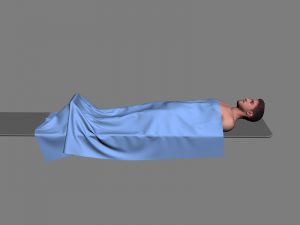
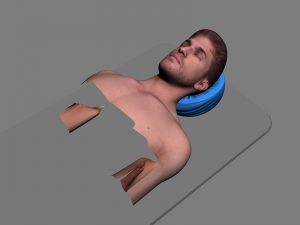
Skinning the model so it can be placed in a supine position on the surface of the surgical table, we don’t need to worry about perfect joint deformation. After posing, we can collapse the stack and do some quick remodeling to fix the joints and make them appear correct.
To create the realistic flow of the drape, create a plane with 100 or so segments in each dimension, and place it above the models of the man and table.
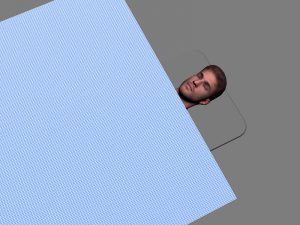
Then use the cloth sim modifier to naturally drape the cloth across the man and the table, collapsing the stack once you’re happy with the outcome.
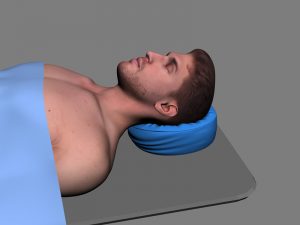
This pillow was modeled using standard polygon modeling techniques with images Googled for reference.
The male model comes with only diffuse textures. However, you can apply an inverted copy of them to the bump channels to create texture on the skin and stubble, which will be picked up nicely later when we do the normal map texture baking.
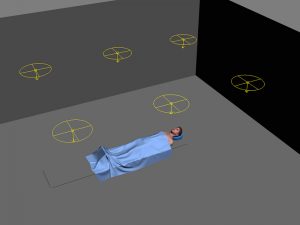
You can create V-Ray materials for the drape and pillow, using the same techniques you would for any high-quality pre-rendered animation. Likewise, set up GI lighting and a simple room environment to catch light and bounce it back onto the models.
Once the high-resolution models and lighting are set up, it’s time to create the low-resolution assets. You can delete any parts of the high-res man that wouldn’t be seen under the drape.
Then, individually export each high resolution model as an OBJ in order to be opened in 3D Coat for auto retopologizing.
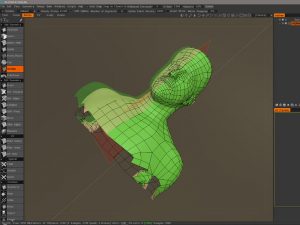
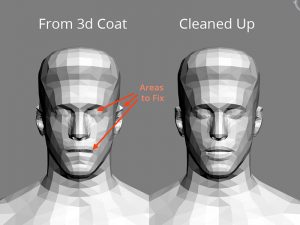
Bring the autoretopologized models back into 3ds Max where you will clean and further refine them so they closely match their high-resolution counterparts.
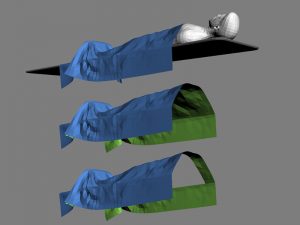
The drape needs to appear to be double sided, so make copy of the low-res drape, flip the faces, and then delete anything that won’t be seen by the user.
With the low-resolution geometry completed, it’s now time for UVW-ing. Apply an UVW Unwrap modifier to each of the 4 low-res components, and unwrap each individually. Do not worrying about where to pack the UV islands at this point.
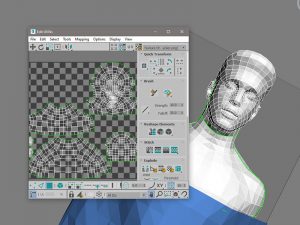
Once completed, attached all four pieces into one mesh, and apply an UVW Unwrap modifier again, this time using only the “Pack UVWs” tool to place and scale all the islands proportionally in respect to each other.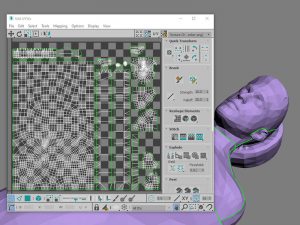
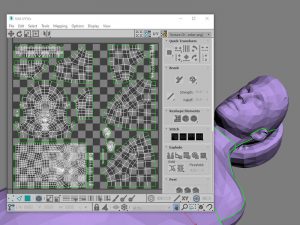
Next, manually resize some of the islands based on the importance of their details. The islands of the man should be scaled up twice as large, and the islands of the drape underside and the pillow underside should be shrunk to half their size, since they would rarely be seen and don’t require much texel detail. Run the Pack UVW tool again, this time making sure to uncheck “Rescale Clusters” so that you don’t lose your custom sizing.
Export a consolidated, low-res model as an FBX to your Unity asset folder, and then detach the pieces into 4 separate components in 3ds Max once again.
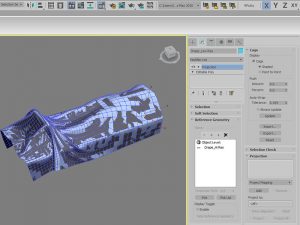
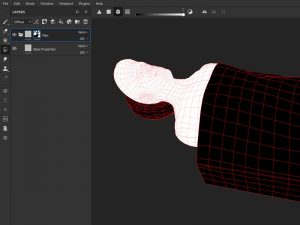
Each low-res component should receive a projection modifier, and its corresponding high-res counterpart added as a reference model. Each cage can be adjusted to properly fit each reference model.
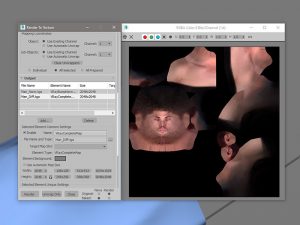
The final step in 3ds Max is to texture bake the normals and the lighting of the high-res models onto the low-res counterparts. To do this, make sure the box environment, table, and all three of the high-res components are unhidden. For each low-res model, unhide it, set up the Render To Texture dialog to output a normal and complete map, and render both.
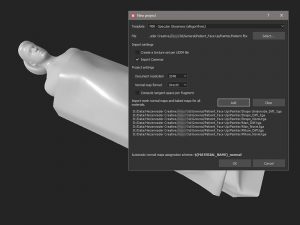
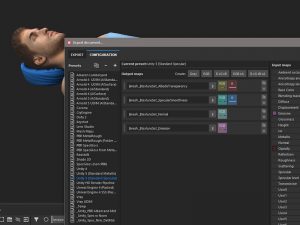
The final steps takes place in Substance Painter. Select all four low-res components, and export them as a single FBX.
In Painter, start a new “PBR – Specular Glossiness” project by importing the FBX and both the normal and diffuse maps that were rendered from 3ds Max.
For each of the 4 components, make a new folder and apply a mask that limits its effect to the appropriate model. Inside each folder, add a fill layer named Base Properties to set up specularity and glossiness.
Drag the normal and diffuse maps to their corresponding slots in each folder.
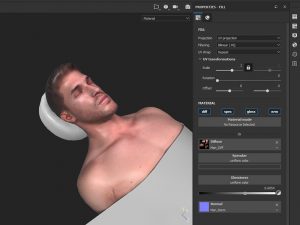
Add final tweaks and adjustments, such as making the lips appear wet or adjusting the skin tone slightly.
Export the maps to Unity’s asset folder using the “Unity 5 (Standard Specular)” preset.
In Unity, create a new “Standard (Specular setup)” shader and apply the albedo, specular, and normal maps to their corresponding slots.
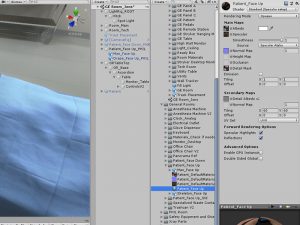
Once the shader is applied to the model, your project is complete.